Amy Fuglestad
701-520-5329
amyfuglestad@gmail.com
403 Pleasant Ave, Crookston, MN 56716
Crookston
Amy Fuglestad lives in Crookston and offers residencies in mixed media
Artist Amy Fuglestad lives in Crookston and works at the University of Minnesota. When she’s not working with students, she creates art. Amy has been an avid maker her whole life, crediting her creative and resourceful mother for this passion.
Art mediums include photography, shibori tie dye, and her favorite, mixed media. Special mixed media elements include gel plate printing, paper and textile dying, stamping, and making embellished tags and journals.
Having studied in Spain and lived throughout Paraguay, Amy developed a love of language, travel, and cultural exchange. As a 4-H Youth Development Specialist in North Dakota and Iowa for over 15 years, Amy coordinated 4-H international programs, communication arts and 4-H camps. Additionally, Amy earned a Spanish teaching degree and taught Spanish for a few years.
Amy sees art in everything and finds every piece of paper, fabric, and cardboard as a possible canvas.
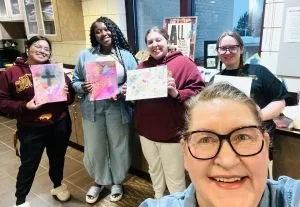
Artist Amy Fuglestad with students
“Nothing is off limits and anything is possible when you get into your creative flow. Art isn’t a finished project, it’s a process.”

Mixed Media Residency
Overview of Residency:
By exploring mixed media art, students will learn the definition of “Mixed Media” and become acquainted with design elements and art principles. In this art series, students create a large sheet of abstract art (Master sheet) that is converted into smaller art pieces using mixed media methods. The final project becomes “Inspiration Decks” or a pair of wall hangings.
*This series can be adapted. Please reach out to the artist to discuss options.
Age/Grade Level: Middle School, Jr High, or Sr High
Length of Residency: 4-5 days, minimum of 55 minute class periods.
Number of Sessions: 4-5 days with each group
Maximum group size: 24
Content of Sessions:
Day 1
Discuss the meaning of “media” in visual art. Invite the class to share different types of media artists use and list them on the board. Examples may include clay, charcoal, crayon, marker, acrylic, watercolor, spray paint, oils, pastels, pen, ink, pencils, stamps, stencils, variety of papers, magazines, books, canvas, cardboard, wood, metal, glass, fabric, ribbon, etc.
Provide students with the definition of mixed media art: artwork that combines more than one medium in a single piece (of art).
Share examples of mixed media art. Ask students what materials the art might be made from. Then read description of artwork and compare those descriptions with the students’ answers.
Students receive 2 handouts - Design Elements and Art Principles, Color Wheel.
Gel Printing explained, rules for use and cleaning will be provided before beginning the gel printing process. Acrylic paint will be presented. The color wheel will be discussed before students select their color scheme. Students will learn about opaqueness/opacity of the paints - as this will be important in the gel plate printing process. Students will make gel prints using 2-3 types of papers to create different textures for the master sheet.
Day 2
Gel Printing - stations at tables include an acrylic sheet as base - taped to table, gel plate, brayer, found objects to create shapes/lines in prints, under paper, paints, paper, pencil to mark student’s name on opposite side of paper. Students will work in groups of two.
Drying Station – space and covering for papers to dry.
If time allows, students will begin “mark-making” on a variety of paper with a variety of medium (markers, paints, pens, etc.). Students will be invited to bring “found fodder” papers such as junk mail, tissue paper, clothing tags, candy wrappers, etc. to add to the master sheet to the following class or choose from items provided.
Day 3
Base Layer - Begin creating the master sheet, a 9”x12” 120 lb. watercolor paper to each student. White crayons or pencils to write a message or intention on the master sheet. Select paper scraps (neutral papers such as old book pages and “found” papers) and adhere to the large sheet. Do this randomly, leaving white space using a glue stick. Each student will have an old magazine as their “glue book” to avoid glue mess.
Mark Making – After the base layer has dried, take a black mark making tool and scribble over what is already on the page/base layer. Water soluble tools may be used.
Scribble Time – now make more scribbles but this time using colors in chosen color scheme/colors you love. Water soluble or markers to be used here.
Water – spritz with water. Colors will move and bleed. Manipulate with cotton swabs/paper towels, watercolor brushes if desired.
Coffee – add coffee grounds on a few spots of the sheet. Add water to activate. Allow to dry or use hair dryer, depending on time.
Inks – splatter acrylic ink onto the master sheet. No more than two colors to be used. Add a small amount of water splatter to the page to help blend the splatter into the page.
Day 4
Stencils – the project is coming together. Select stencils and stamps to add image and color in random places all over the master sheet. Switch colors and images (stamp/stencil) as you go around the page. Use 3-4 colors but use them add less of each color as you go. This will bring different patterns and colors. Think about colors. How do they relate to what’s already on the sheet? How do they relate to one another? Vary the stencil or stamp that you use. Go in a variety of direction to bring in different patterns. Use black as well as color when adding these marks. Allow to dry before next step.
Fold & Tear – It’s decision time. Will you make an inspiration deck or wall hanging? Fold the master sheet carefully in half and press down with a ruler, moving back and forth while holding down. Flip the entire sheet so that the inside folded edge in now the outside folded edge and run your ruler back and forth a few times. At this time you might be ready to tear. Or you may do one more fold before tearing.
Day 5
Focal Points and Message – select image and stamp focal point and words/messages onto a separate piece of paper (tissue, gel print, etc.). Add medium to focal points. Use design elements to determine placement of focal point on art pieces. Place and adhere. Once in place use a variety of mediums to embellish and finish your art pieces. May include acrylic paint markers, ribbon, etc.
Closing Activity - Students will write a statement explaining what materials they used, color choices, and images or shapes used in their art. Describe what their piece conveys and what they learned. A handout will be provided for this piece. This brief statement will be used at the students’ art display to be held at a date to be determined.
Supplies:
Watercolor paper 9”x12” (120-140 lb.)
Torn papers – including junk mail, security envelopes, colorful tissue paper, old art pieces, magazines, discarded book pages, wrappers, etc.
Glue sticks
Old catalogs/magazines as work surface protector
Water soluble mark making tools in a variety of colors (graphite, Stabilo Woodies, pastels, watercolor pencils, etc.
Spray bottles or mister for water
Acrylic paints – black, white and 2-3 colors for each student (to be shared)
Makeup wedges or applicator for stencils
Ruler for folding
Scissor
Stamps and Inks for creating focal points
Acrylic paint markers, gel pens, markers
Paint brushes, mark makers, recycled items to use as mark making in gel prints (such as empty toilet paper rolls, egg cartons, packaging paper, bubble wrap, etc)
Gel print plates, brayers, acrylic pad, tape
For questions or to request changes to this proposed *schedule, contact Amy Fuglestad at 701-520-5329, by email amyfuglestad@gmail.com or write to the artist at 403 Pleasant Ave, Crookston, MN 56716.
*Mini sessions are available. Please contact me for details.